Intel RealSense D435 + RTAB-Map: 3D Map of Your Room in One Sitting
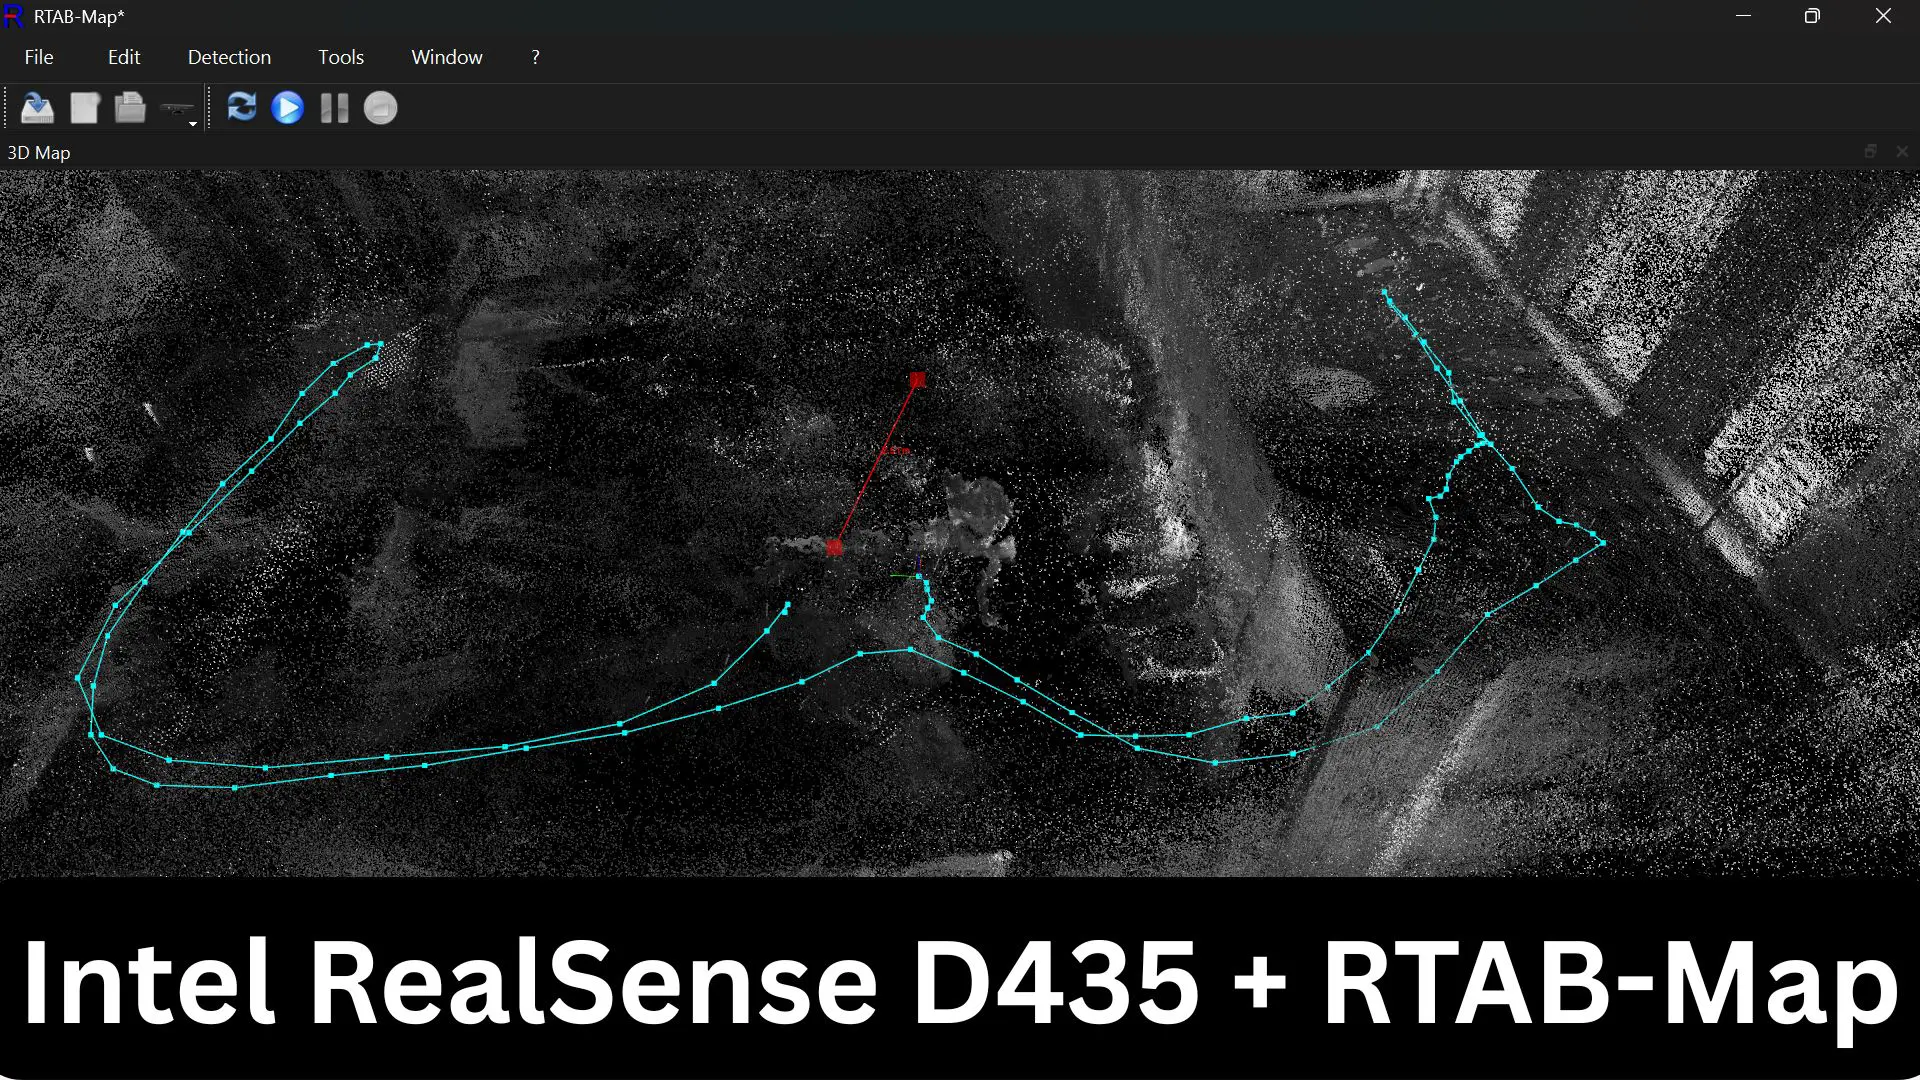
Depth cameras get treated like advanced research equipment that requires a Linux machine, a full ROS installation, and three hours of compile time before anything works. For the Intel RealSense D435 on Windows, that is not true. Two downloads, a USB 3.0 port, and thirty minutes of setup is enough to have a real-time 3D map of a room building in front of you.
This is a tutorial for that path — no ROS, no Linux, no source builds. Just the Intel RealSense Viewer to verify the camera works, and RTAB-Map’s Windows standalone to do the actual mapping. By the end you will have a navigable 3D point cloud you can export and inspect.
This also happens to be the first step toward something more ambitious: running this pipeline on a Raspberry Pi companion computer feeding position data to a flight controller for GPS-denied drone autonomy. That part is not in this post — it requires more hardware and more time — but the foundation is here.
What RGB-D Actually Means
The D435 is an RGB-D camera — it outputs a standard colour image (RGB) and a per-pixel depth image (D) simultaneously, aligned to the same frame. Depth is computed using two infrared stereo cameras and an IR dot projector that adds texture to featureless surfaces. Each pixel in the depth image carries a distance value in millimetres. Practical range is 0.2 m to about 4 m indoors before noise becomes significant.
The combination of colour and depth is what makes 3D reconstruction possible without external sensors: you know both what something looks like and how far away it is, which is enough to build a geometric model of the environment as you move through it.
What You Need
Hardware:
- Intel RealSense D435
- USB 3.0 cable and a genuine USB 3.0 port on your machine
USB 3.0 is not optional. The D435 streams depth + colour at 30fps and needs the bandwidth. A USB 2.0 port will connect but will drop frames aggressively — your depth stream will stutter and RTAB-Map’s odometry will lose tracking within seconds. Check Device Manager on Windows to confirm your port is USB 3.0 before starting.
Software — two downloads:
Download 1 — Intel RealSense SDK 2.0 (includes RealSense Viewer) Go to the GitHub releases page and download the Windows installer: 👉 github.com/IntelRealSense/librealsense/releases
Look for Intel.RealSense.SDK-WIN10-x.x.x.exe in the Assets section of the latest stable release. Run the installer — it includes the Viewer, the SDK libraries, and the drivers the camera needs.
Download 2 — RTAB-Map Standalone for Windows Go to the RTAB-Map GitHub releases page: 👉 github.com/introlab/rtabmap/releases
Download the Windows zip for the latest release. Extract it anywhere. The RealSense2 driver is bundled in the standalone build — no separate compilation required — but the Intel RealSense SDK must be installed first or RTAB-Map will not find the camera.
Step 1 — Verify the Camera in RealSense Viewer
Before touching RTAB-Map, confirm the camera is working correctly. This step saves you a lot of diagnostic confusion later.
Plug the D435 into your USB 3.0 port and open RealSense Viewer from the Start Menu.
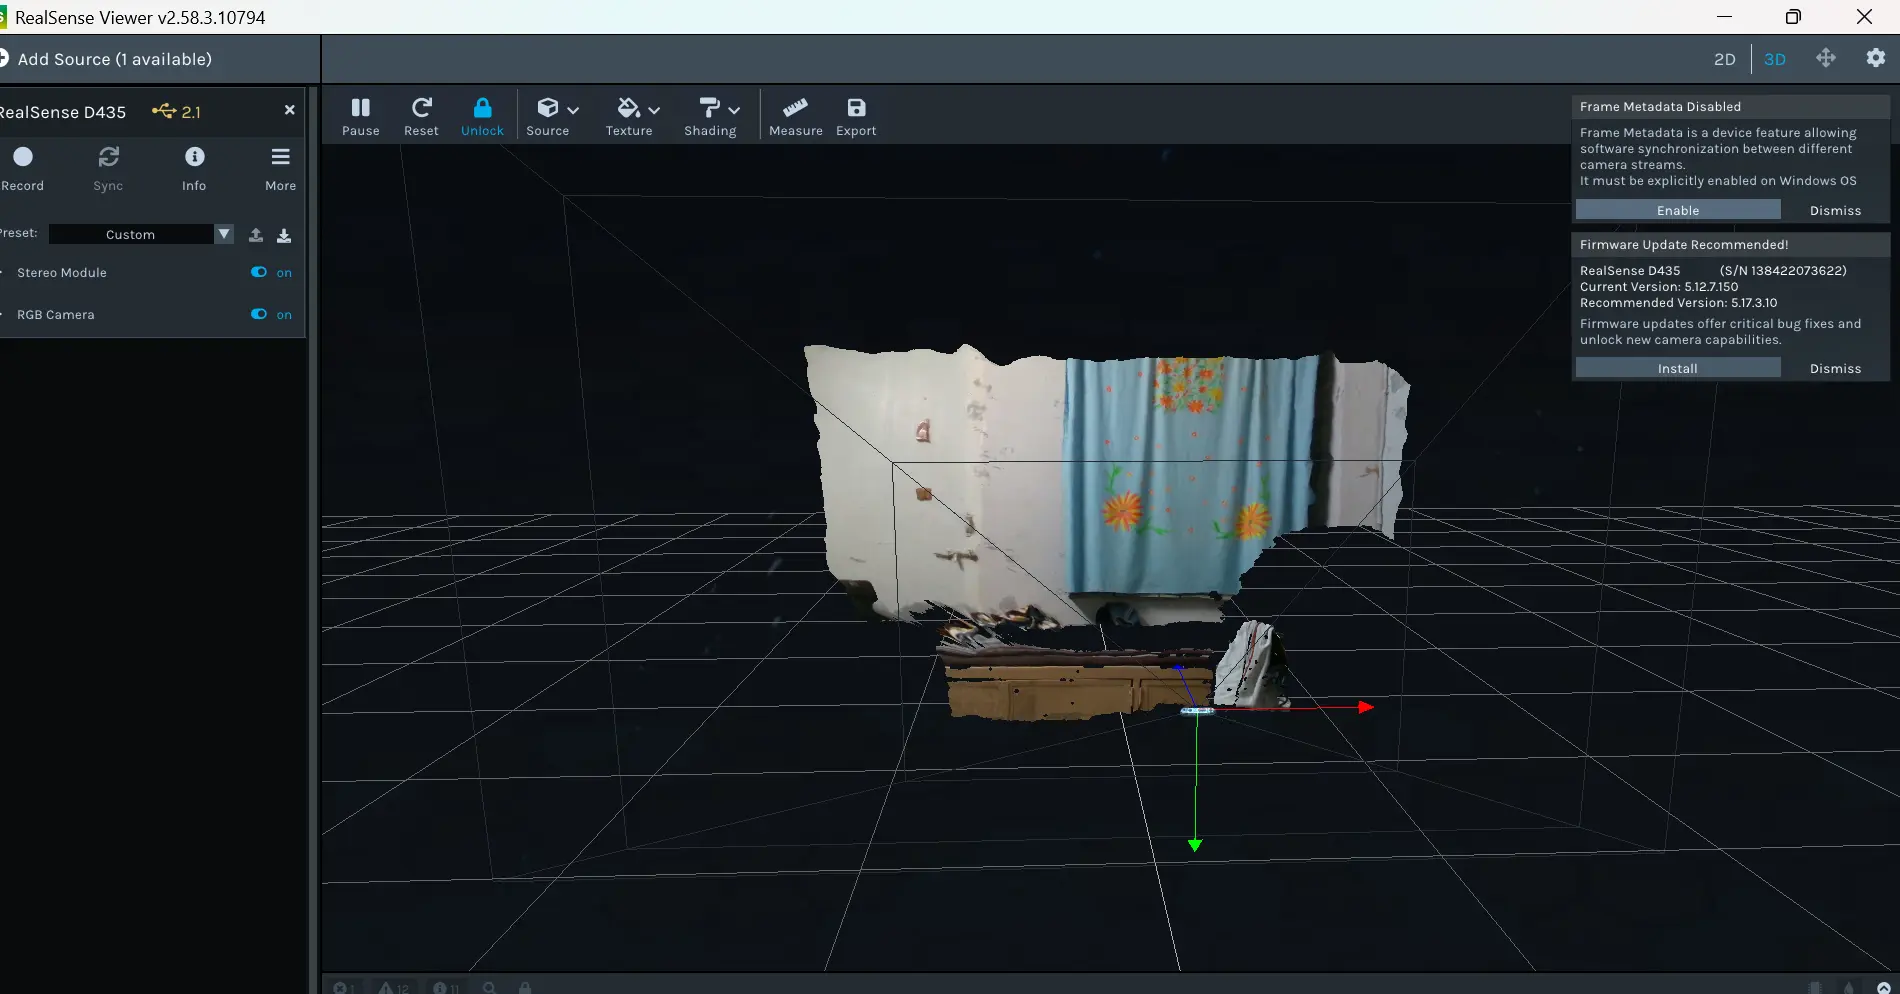
RealSense Viewer with the Depth and Color streams active. Depth is shown in the jet colourmap — warm colours are close, cool colours are far. The point cloud button (top right) renders a 3D view from the current frame.(I don’t have USB 3.0 so I used 2.0 for testing)
Enable two streams: Depth and Color. You should see the depth stream immediately — a live colourmap where warm colours are near and cool colours are far. Enable the 3D view button in the top right; you should see a live point cloud of whatever is in front of the camera.
Things to check:
- The depth stream should be smooth and continuous at 30fps. If it stutters or shows as 6fps, you are on USB 2.0.
- Point the camera at a blank wall from about 1 m — the depth image should be a solid uniform colour, not noisy. Significant noise at 1 m suggests either a USB bandwidth problem or a firmware issue.
- Look at the device info panel (left sidebar) and confirm the firmware version is current. The Viewer has a firmware update option — run it if you are more than one version behind.
One setting to change: Under the Depth sensor options, find the Visual Preset dropdown. Change it from the default to High Accuracy. This trades some depth range for lower noise and better precision at indoor distances — exactly what you want for room-scale mapping.
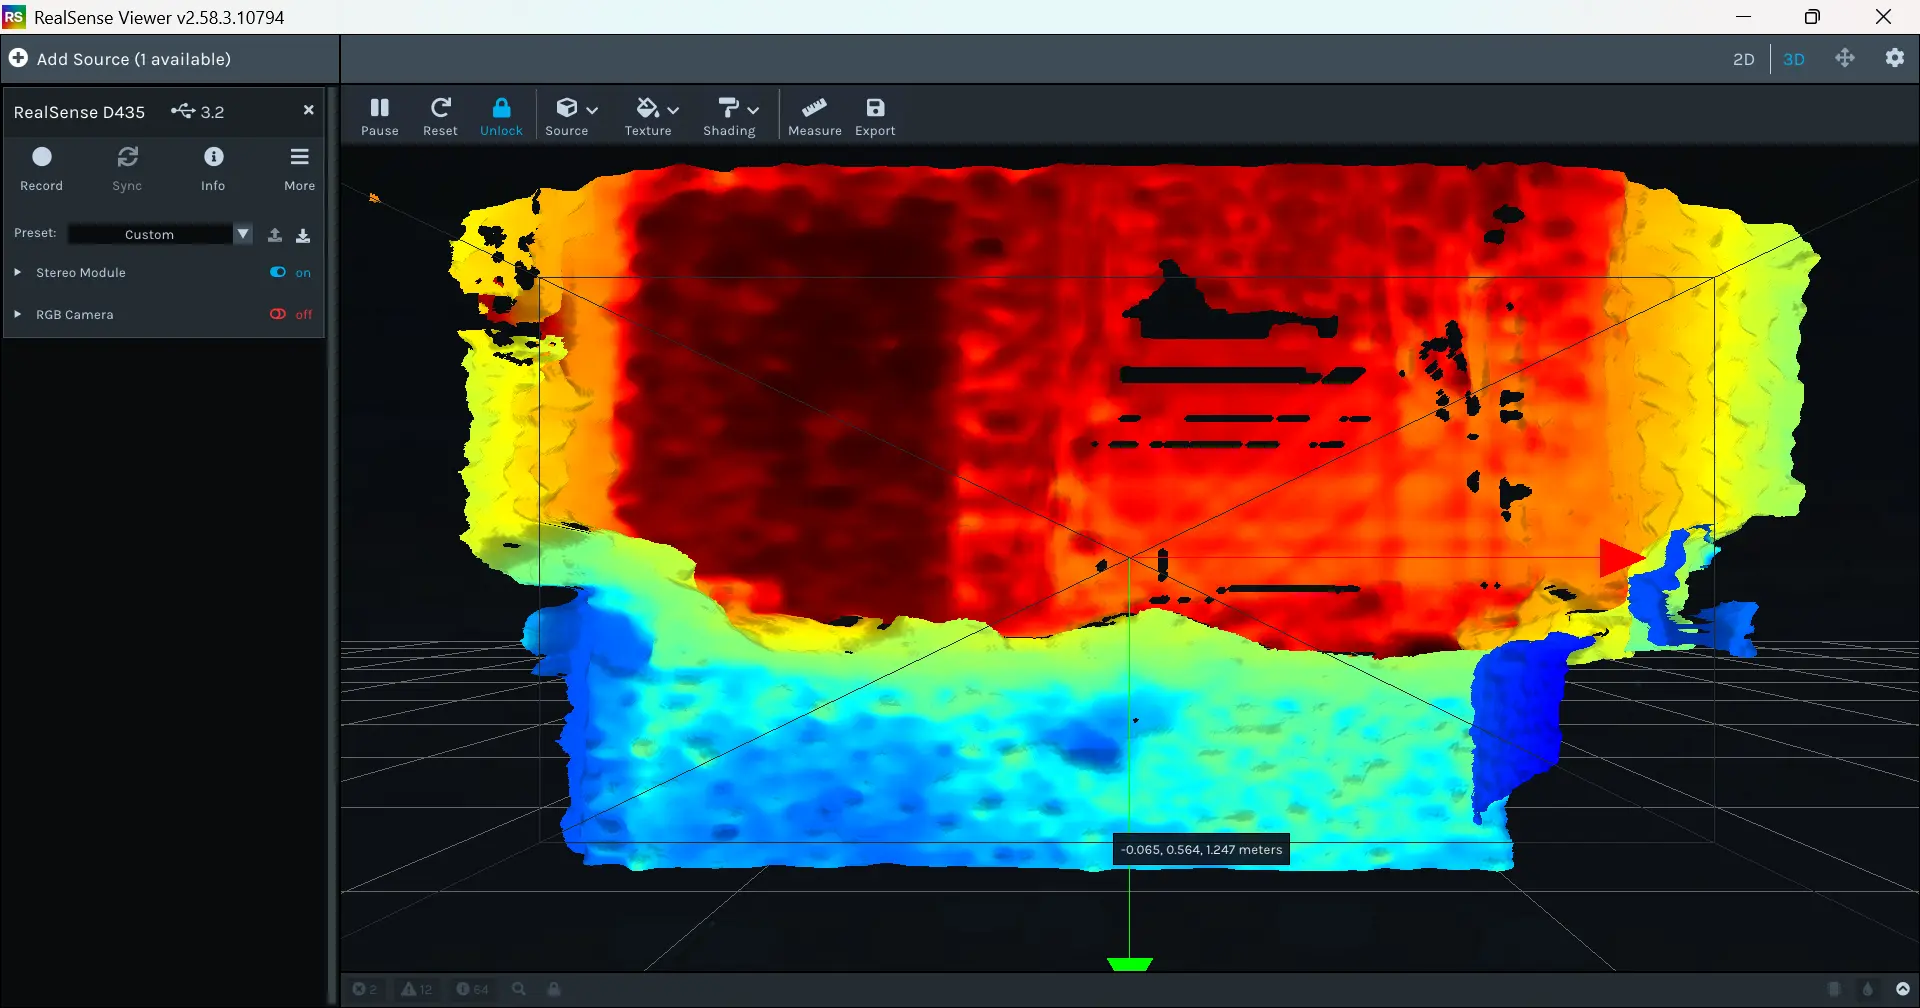
Live 3D point cloud in the RealSense Viewer. This is a single frame — RTAB-Map will accumulate thousands of these into a persistent map.
If depth and colour are streaming cleanly, close the Viewer. The camera is ready.
Step 2 — Set Up RTAB-Map
Open rtabmap.exe from the extracted folder.
On first launch, go to Edit → Preferences. The only critical setting is the Source — this tells RTAB-Map which camera to use.
Under Source → Camera, set the driver to RealSense2. If RealSense2 does not appear in the dropdown, the Intel SDK is either not installed or installed after RTAB-Map was opened — restart RTAB-Map after confirming the SDK is installed.
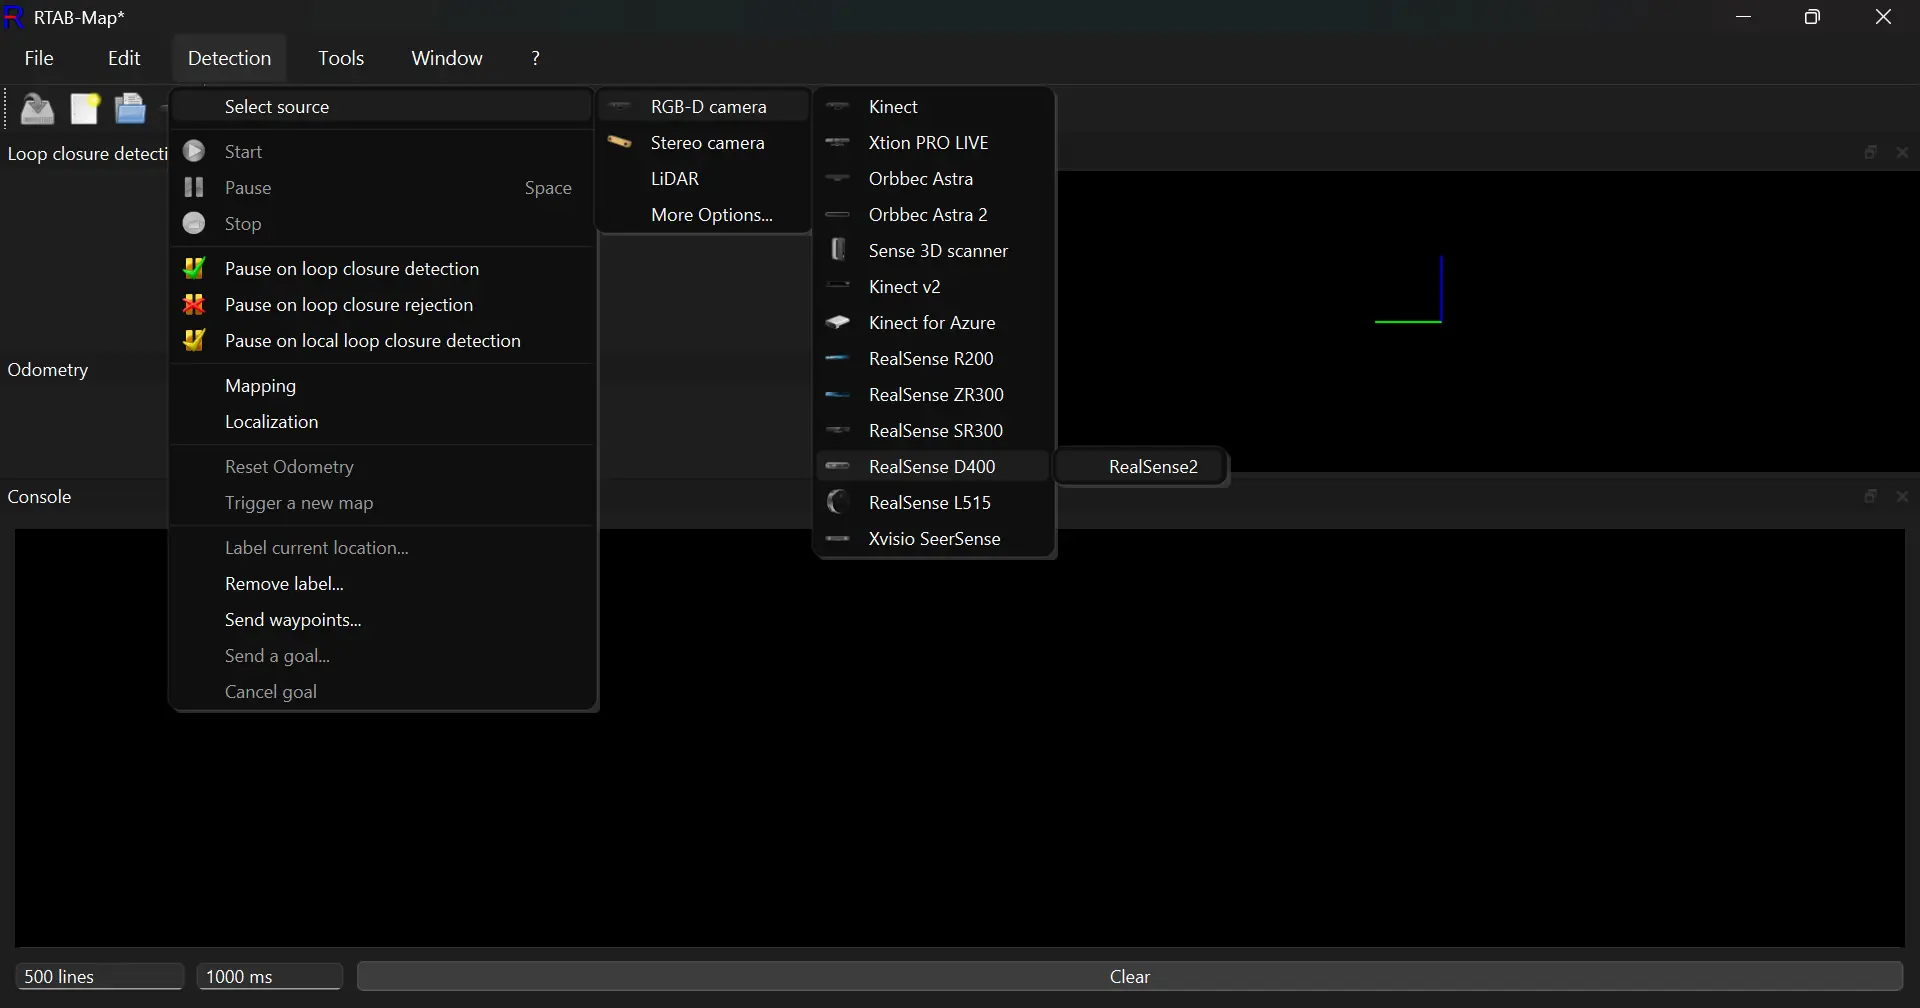
RTAB-Map Preferences → Source → Camera. Select RealSense2 as the driver. If it is greyed out or missing, the Intel RealSense SDK needs to be installed and RTAB-Map restarted.
realsense-viewer — if the Viewer launches, the SDK is installed correctly.
Settings to set in Preferences:
Under Source → Camera → RealSense2 options:
- Resolution:
640 × 480at30 fps— this is the sweet spot for real-time odometry. Higher resolution increases processing lag and RTAB-Map will drop frames on most laptops. - Enable Depth and Color streams.
Under General → Map assembling:
- Map update rate: leave at default (1 Hz is fine for indoor room-scale)
Under Odometry:
- Method: F2M (Frame to Map) — more stable than frame-to-frame for indoor environments with repeated textures. This is the default and usually the right choice.
Close Preferences. You are ready.
Step 3 — Running Your First Mapping Session
Click the green Start button. RTAB-Map will open the camera, display the live feed, and begin building the map from your very first frame.
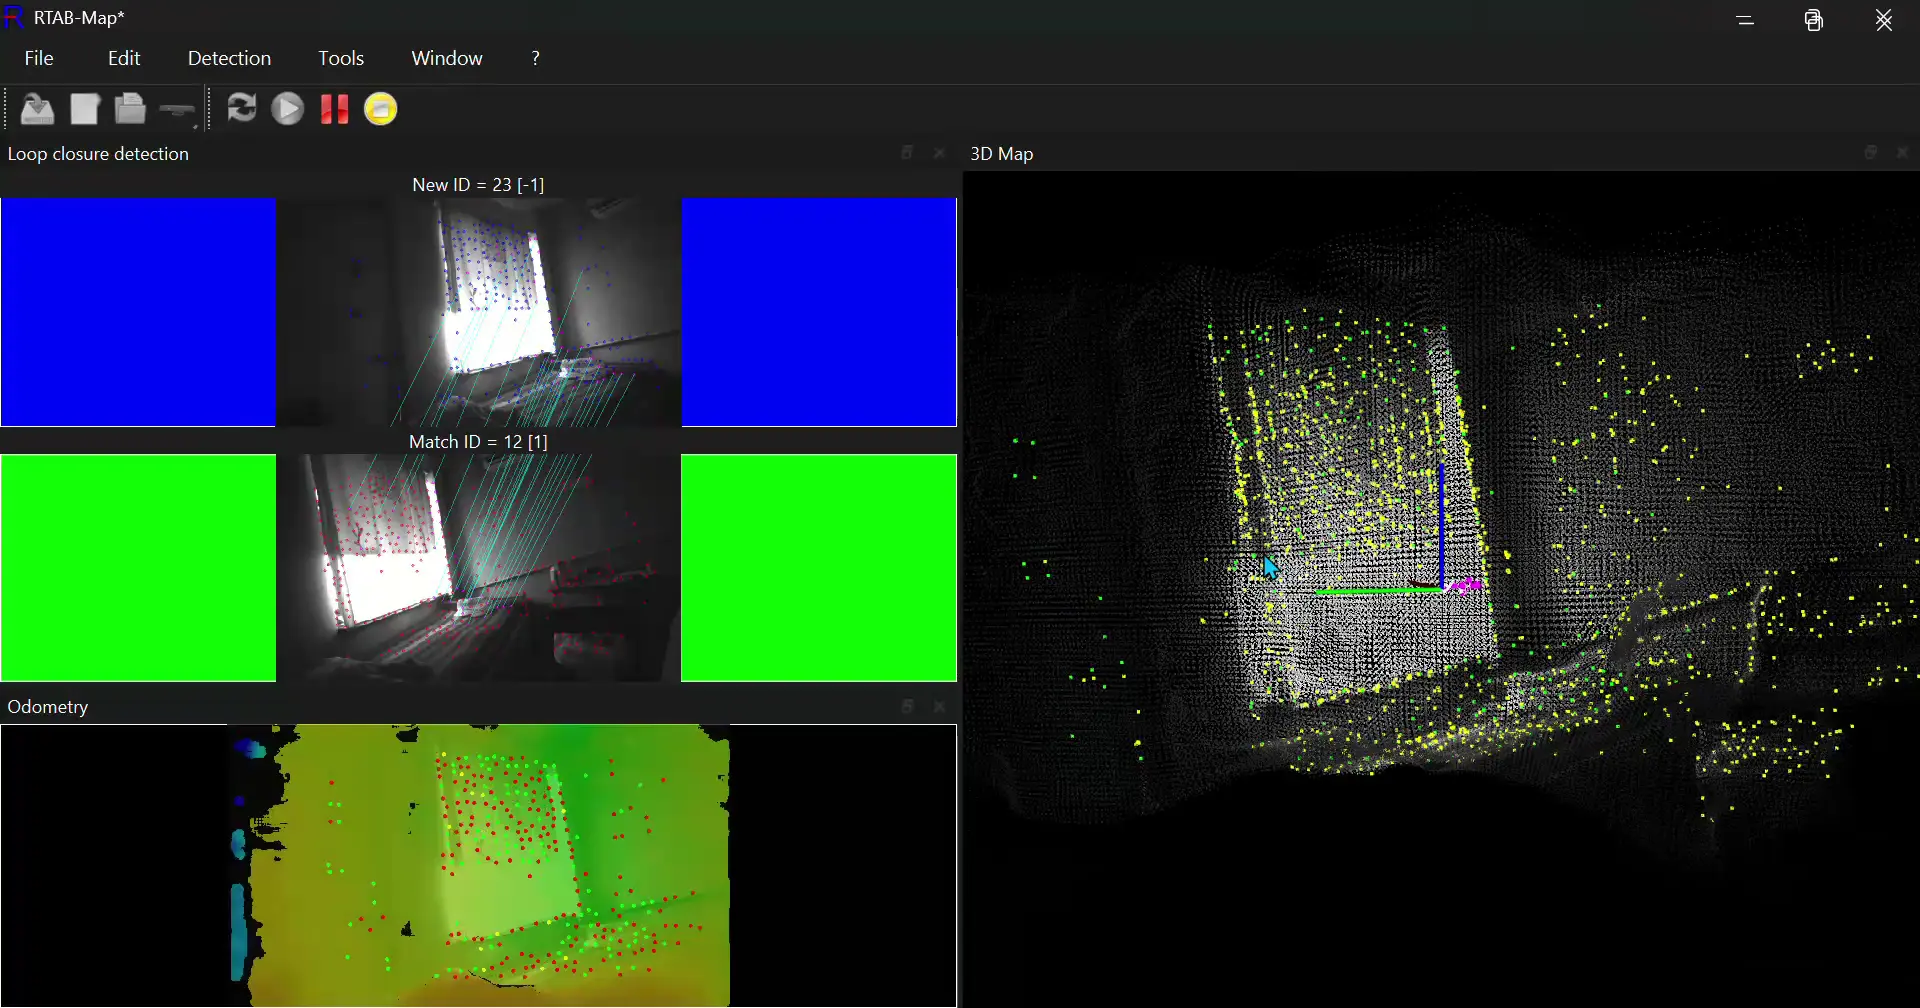
RTAB-Map mid-session. Top-left: live colour feed with detected features overlaid. Top-right: the accumulating 3D point cloud. Bottom: the pose graph — each node is a keyframe, each edge is an odometry or loop closure constraint.
How to move — the single most important technique:
Move slowly. Slower than you think. The odometry algorithm tracks visual features between consecutive frames — if you move too fast, features leave the field of view before the next frame is captured and tracking is lost. A walking pace is too fast for close-range indoor mapping. Think: “deliberately slow pan.”
Specific rules that will save your session:
- Overlap: always keep at least 60% of the previous frame visible in the current frame. This means very small translational steps and slow rotations.
- Tilt the camera slightly downward (about 20–30°). Floor texture is rich in features and gives the odometry something reliable to track during translations.
- Avoid blank walls and windows. A featureless white wall has no trackable features. Large windows appear as black voids in the depth image. Move past these quickly.
- Revisit areas. When you return to a place you have already mapped, RTAB-Map’s loop closure detector fires — it recognises the location, corrects any accumulated drift, and snaps the map together. This is the key capability that makes the final result coherent.
What good tracking looks like: In the top-left panel you should see green feature points tracked between frames. The pose graph (bottom panel) should show a clean chain of nodes with no sudden jumps. The 3D cloud (top-right) should accumulate smoothly.
What lost tracking looks like: Feature points drop to zero or near-zero. The pose graph shows a disconnected node. The 3D cloud stops updating. When this happens: stop moving, hold the camera still for 2–3 seconds, then very slowly return to a position where you can see well-textured surfaces. RTAB-Map will often recover automatically.
A good first session is a single room, walked slowly around the perimeter twice — once to build the initial map, once to trigger loop closure. Total time: 3–5 minutes of careful movement.
Step 4 — The Output
When you are done, click Stop. RTAB-Map saves the session to a .db file automatically.
To export the point cloud:
- Go to File → Export point cloud
- Choose
.plyor.pcdformat .plyopens in MeshLab, CloudCompare, or Blender..pcdis the standard format for PCL (Point Cloud Library) workflows.
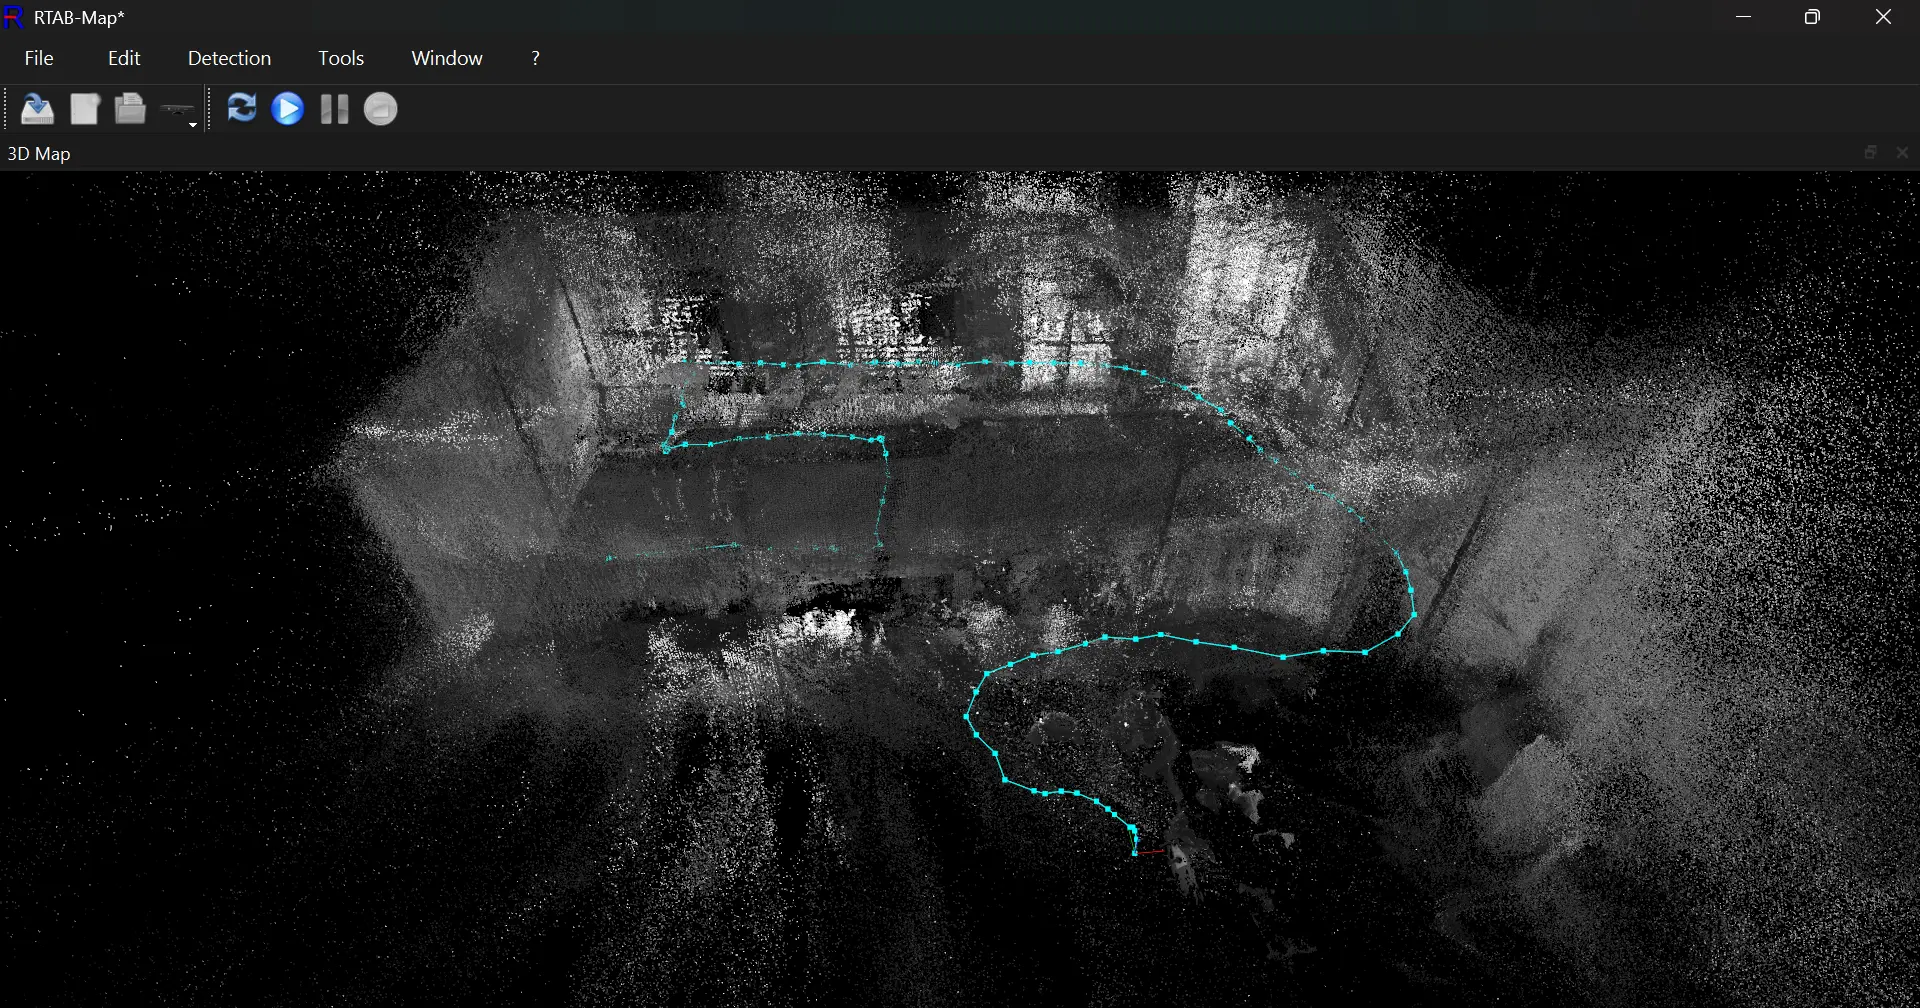
The exported point cloud from a single-room mapping session. The geometry of the walls, floor, furniture, and ceiling is clearly resolved. Colour comes from the RGB stream aligned to depth.
Honest assessment of quality: Indoor room-scale mapping with the D435 is genuinely good. Flat surfaces (walls, floors, tables) come out clean. Fine geometry (chair legs, cables, narrow objects) is noisier. Outdoor use is significantly worse — ambient infrared washes out the structured light projector. For drone-scale indoor environments and corridor mapping, the D435 is a capable sensor.
The D435 vs D435i — Which One for Drone Work
The D435 has no IMU. The D435i adds a built-in IMU (accelerometer + gyroscope). For drone autonomy specifically, the IMU matters: it provides a second odometry source that keeps tracking alive during fast rotations and brief loss of visual features.
For this tutorial (desktop mapping) the D435 is identical. For Raspberry Pi + drone integration, the D435i is the better choice — the IMU can be fused with the visual odometry through RTAB-Map or through a separate filter to give more robust pose estimates during dynamic flight.
Where This Goes Next
Raspberry Pi 4B: Running RTAB-Map on a Pi 4B with the D435 over USB 3.0 (via the Pi’s USB 3.0 port) is feasible at reduced resolution (424×240 at 15fps) but demands careful CPU management. The Pi does not have enough compute for RTAB-Map’s full feature extraction pipeline at real-time rates — this requires either reduced parameters or a Jetson Orin for full frame rates. That is a separate post once the hardware is in hand.
ROS2 integration: The RealSense ROS2 wrapper (realsense2_camera) publishes aligned depth and colour topics that RTAB-Map’s ROS node (rtabmap_ros) consumes directly. This is the production path for drone integration — RTAB-Map’s /rtabmap/odom topic feeds into MAVROS as a position source for the flight controller. The ROS path requires Linux and a proper ROS2 Humble install, and will be covered once that pipeline is validated on hardware.
The autonomous mission piece is further out — getting a reliable visual odometry source into MAVLink position hold mode requires tuning the EKF2/EKF3 position source weights in ArduPilot, which needs real flight testing. The point cloud you generated in this tutorial is the first link in that chain.
The Raspberry Pi power architecture that keeps a companion computer alive on a drone battery without bricking it is covered in a separate post.